How it works
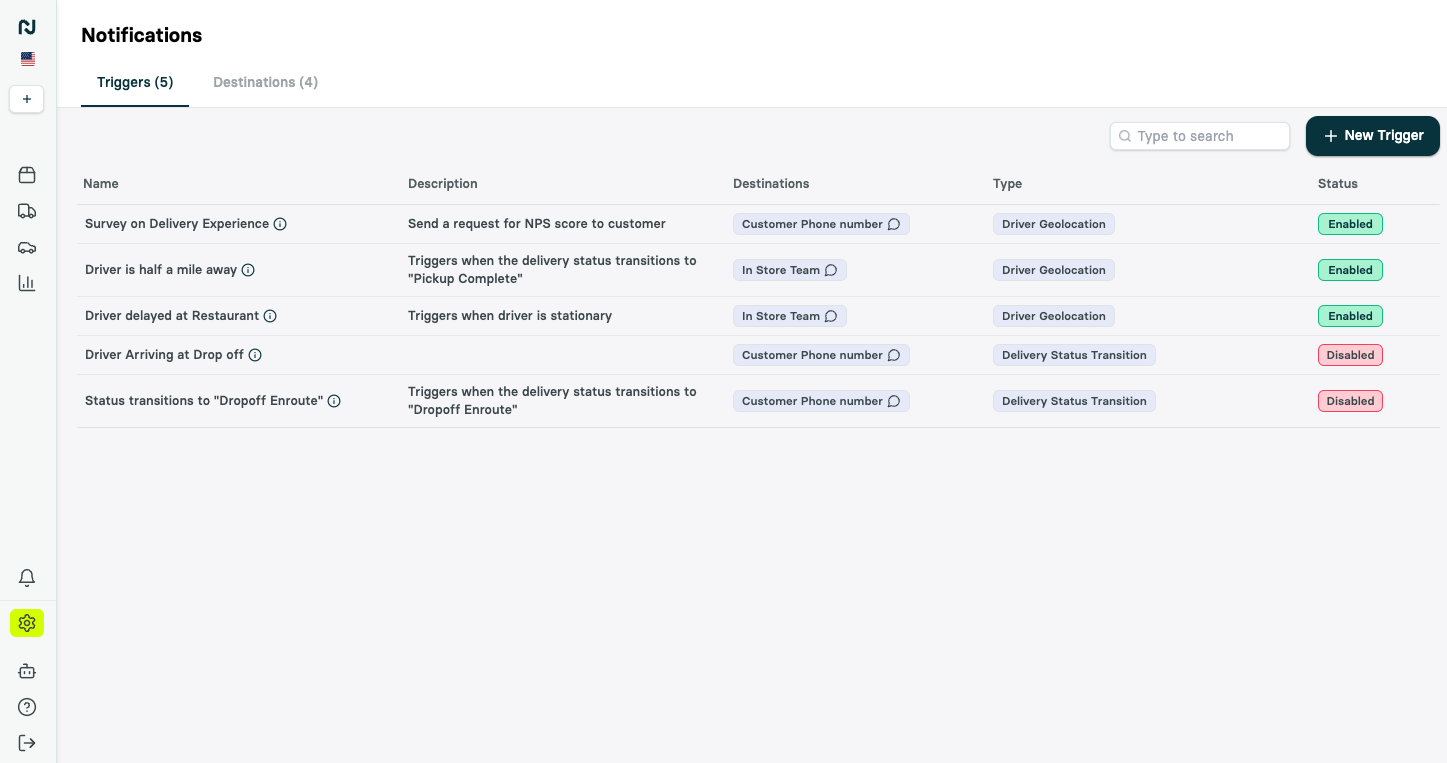
You manage notifications under Settings > Notifications in the Portal, built from three pieces:- Triggers define when a notification fires and what it says — an event (a status change, a delay, a failed dispatch) paired with a message.
- Destinations define who receives it and where — a reusable audience on one or more channels.
- Settings control how messages are sent, including sending SMS from your own number.
Channels
Notifications can be delivered across multiple channels:SMS
Slack
Webhook
Events you can notify on
Nash ships a broad catalog of triggers, grouped by what they watch:- Delivery — a delivery reaching a new status (Pickup Complete, Dropoff Enroute, Dropoff Complete), incident reports, task reassignments, a failed auto-dispatch or cancellation, delivery attempts exhausted, a proof-of-delivery photo uploaded, and more.
- Driver — a driver’s distance or time from pickup or dropoff, entering or leaving a zone, a location that doesn’t match the reported status, and pickup or dropoff ETAs running late.
- Status — a delivery stuck in one status too long, statuses changing faster than expected, and live-monitoring health changes.
- Order — an order that needs attention, is ready to fulfill, hasn’t dispatched as pickup nears, or has an address that won’t validate, plus optimization outcomes and an event you fire yourself from the API.
- Refund — refund requests as they move through review.
For the complete catalog of triggers and the events behind them, see the notifications catalog.
Discover trigger types from the API
Get notification trigger catalog (GET /v1/notification-triggers/catalog) returns the trigger definitions your integration can use to build notification tooling. Each response includes:
triggers, with each trigger’s type, title, entity type, statuses, parameter schema, supported filters, and supported actionsfilterCriteria, with the shared fields and operators available for narrowing a triggeractions, with the action types a trigger can run
Customer notifications and the tracking page
Customer messages typically include a tracking link ({{job_tracking_link}}) that opens Nash’s live-tracking page, where the customer sees the courier’s position on a map and real-time status updates. You can embed that same live-tracking experience directly in your own web or mobile app — see Embedding the Nash live-tracking experience.
Destinations: choose who hears it
A destination is a reusable group of recipients. Build as many as you need, mix channels within one, and point any number of triggers at it. Recipients can be:- Static — a specific email address, phone number, Slack channel, or webhook URL.
- Dynamic — a variable resolved per delivery, such as
{{customer.phone_number}}to text the recipient or{{provider.slack_channel}}to post in the assigned provider’s channel.
Target the right deliveries
Not every trigger should fire on every delivery. Each trigger has an Advanced section to narrow when it runs:- Dispatch strategies — only deliveries that use selected dispatch strategies.
- Contracts — only deliveries on selected contracts.
- Conditions — only deliveries whose metadata matches conditions you define, combined with AND/OR. Operators include equals, does not equal, greater than, less than, contains, starts with, and ends with — for example, fire only when
priorityequalshigh.
Flag deliveries for live ops
A trigger can do more than send a message — it can flag the delivery so your team works it from the Flagged view in the Portal, turning passive alerts into a live queue. For triggers that watch an ongoing condition — a stuck status, a late pickup, or a late dropoff — enable auto-resolve to clear the flag automatically once the delivery recovers, so the queue only shows problems that are still live.Customize your messages
Every message supports dynamic variables so it reflects the specific delivery. Variables span the customer, pickup, dropoff, job, order, and delivery-provider context — for example{{customer.first_name}}, {{pickup_business_name}}, {{dropoff_eta}}, {{job_tracking_link}}, and {{driver.name}}. The notifications catalog lists every variable, and Nash adds to it regularly.
By default Nash sends SMS from its own messaging service. Your organization can instead send from its own Twilio account and sender identity, so texts arrive from a number your customers recognize — available on the Settings tab under Settings > Notifications.
A trigger can also add a custom event to the delivery’s timeline when it fires — useful for tracking, or to start a workflow.
For richer customer-facing customization — re-skinning the live-tracking page or embedding only selected widgets — see the advanced options in Embedding the Nash live-tracking experience.
Track what Nash sent
Open any delivery in the Portal and select the Notifications view on its timeline to see every message Nash sent for that job — the trigger, the message, where it went, and when — along with any replies that came back. It’s the fastest way to confirm a customer was notified.Deny list
The deny list is how you suppress notifications for a specific contact who has opted out of communications. Each entry records a type of communication and the value for that type — for example an email address or a phone number — giving you fine-grained, per-contact control over who Nash messages.1
Add a contact
Add a contact to the deny list (
POST /v1/organization-management/notifications/deny-list) opts a contact out. Provide the required type and value; that contact will no longer receive delivery notifications.2
Review the list
Get contacts in the deny list (
GET /v1/organization-management/notifications/deny-list) returns the suppressed contacts, with page / pageSize pagination.3
Remove a contact
Remove a contact from the deny list (
DELETE /v1/organization-management/notifications/deny-list) opts the contact back in so they resume receiving notifications.The deny list operates at the organization level. Adding a contact suppresses Nash-sent notifications for that contact across deliveries, not just a single job.
Next steps
Notifications catalog
Every trigger, channel, and dynamic message variable.
Trigger catalog API
Read the current trigger types, filters, actions, and configuration schemas.
Add to deny list
Suppress notifications for a contact.
Live-tracking embed
Embed the Nash tracking page in your own app.
Workflows
Drive automated actions when a trigger fires.